"How to add your own ringtone to an iPhone ah?" That was what my uncle asked me the other day during Chinese New Year. Ah, yes. Although Apple has been allowing more customisation features on the latest iOS, that has not been the case for making our own ringtones.
Let's be honest, the ringtone selection on the Apple iPhone is not very desirable. But most casual users (who are the main target market) don't really care that much and that's fine. Still, there are a number of us who would like to play our favourite tunes or a part of our favourite songs as ringtones. If you want to learn how to customise a ringtone for your iPhone, continue below to read which one best fits your preference.
The old way - Using iTunes
For the Gen Z'ers, iTunes is an old program that functions like Apple Music but nobody really uses it anymore. It is somehow miraculously still around so you can still download it on a Mac or Windows PC. Comparing this method and the new one (GarageBand), I personally think using iTunes is more complicated but less restricted which we will get to later. First, let's learn how to select a part of a song to be your ringtone.
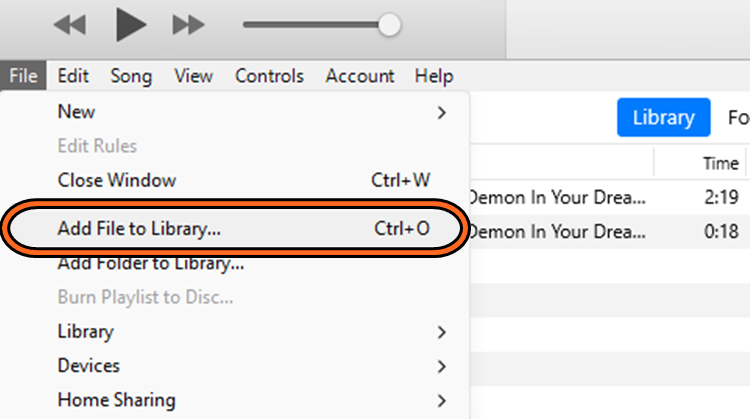
1. If you already have a song in the library, skip this. If not, go to File then Add File to Library.
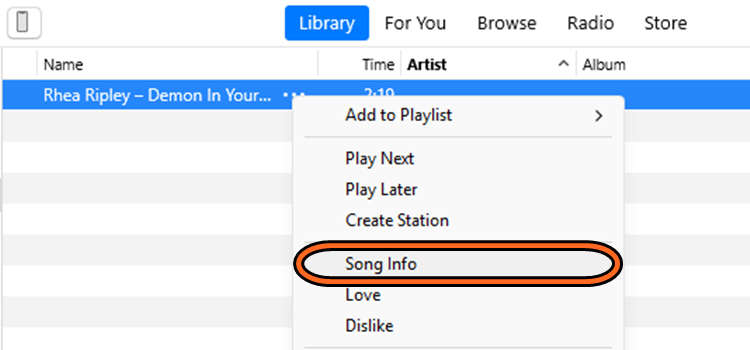
2. After adding the song, right-click the track and go to Song Info.
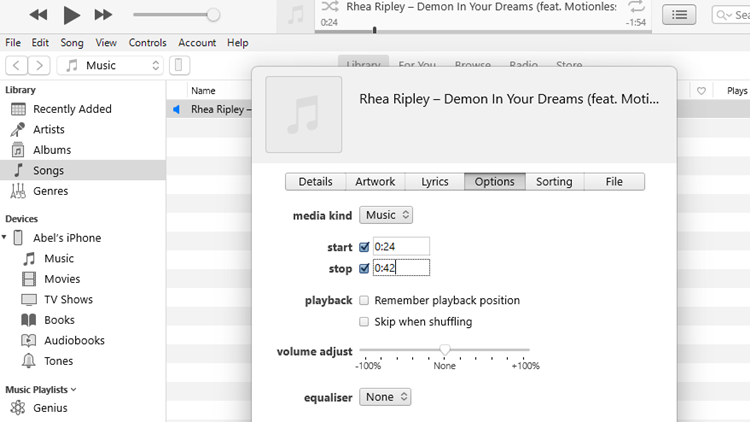
3. Under "Options", choose which part of the song you want to start. Remember, a ringtone's duration for an iPhone is only 30 seconds.
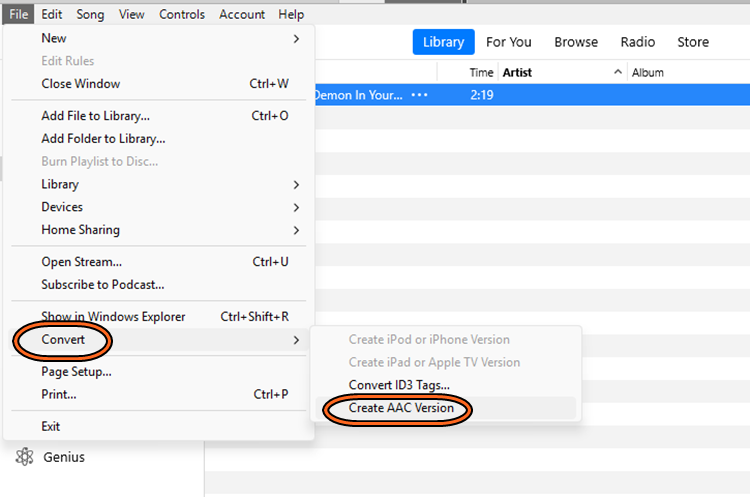
4. After step 3, go to Files > Convert > Create AAC Version. The shorter duplicated song will appear below the original song.
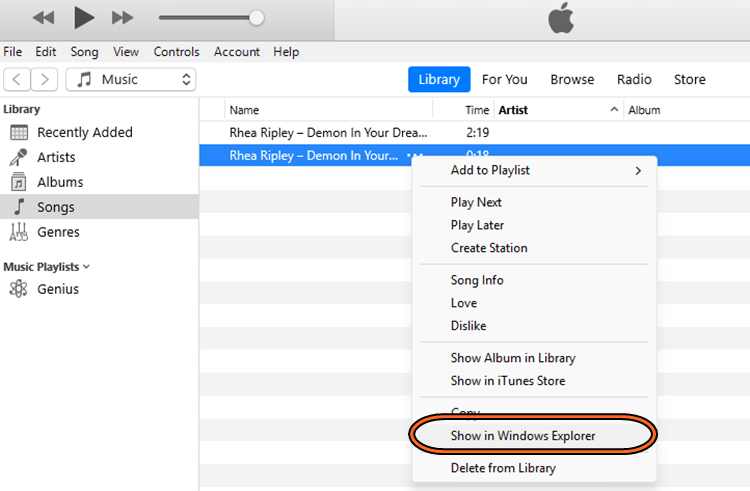
5. Click on "..." beside the duplicated song and go to Show in Windows Explorer. Make sure to take it out and put it in a folder that's easy to find (e.g. the default Music folder)
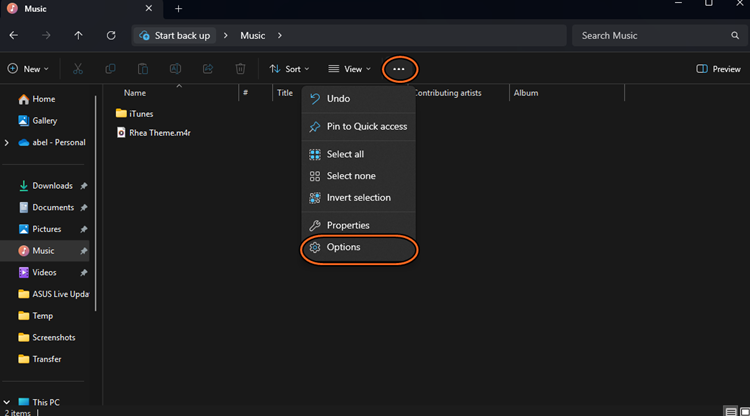
6. If you already can see the hidden file format, skip this. If not, click on "..." in the folder and go to options.
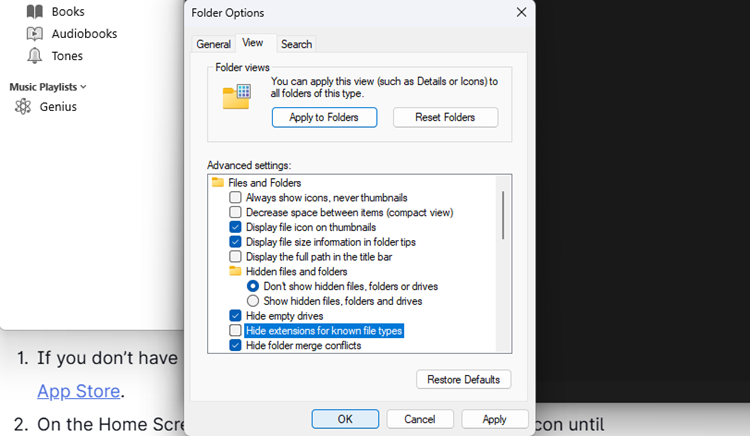
7. Go to View and untick "hide extensions for known file types".
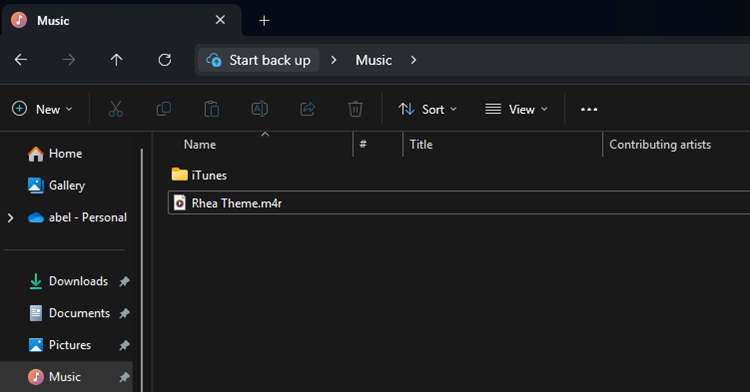
8. You should be able to see the m4a format at the end of the track name. Change the m4a to m4r format.
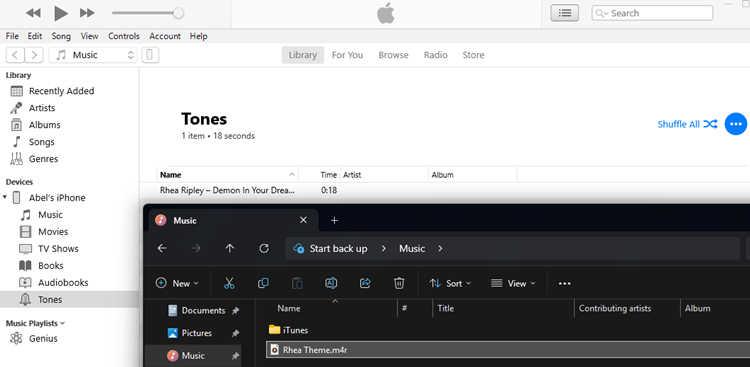
9. Simply drag your newly created ringtone to the Tones section and it should be transferred automatically.
Congratulations, you have successfully passed the complicated part. The next few steps will be easy. To transfer your newly created ringtone, connect your iPhone to your PC via a Lightning or USB C cable then connect it to iTunes. As seen in the last screenshot above, you will see your (name) iPhone under Devices on the left column. Go to tones, then drag and drop your customised ringtone there and it will be inside your iPhone. If not, click the sync button to transfer it.
The new way - Using GarageBand
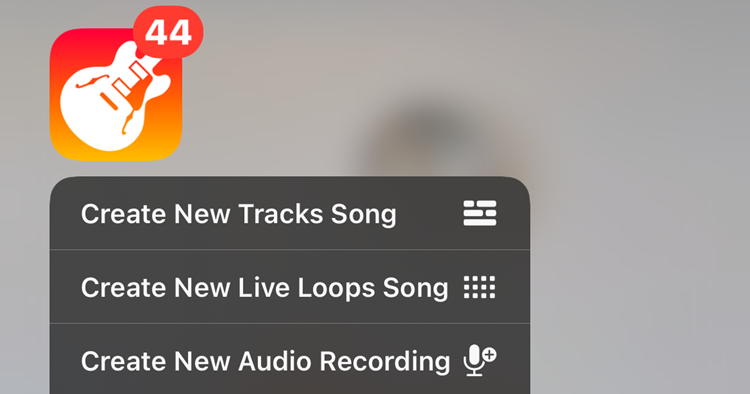
1. Download the GarageBand app from the Apple App Store. Press-hold the app and go to Create New Audio Recording to begin.
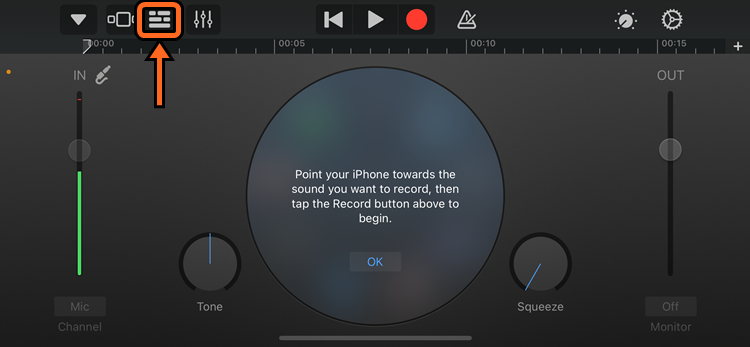
2. Go to the Tracks button.
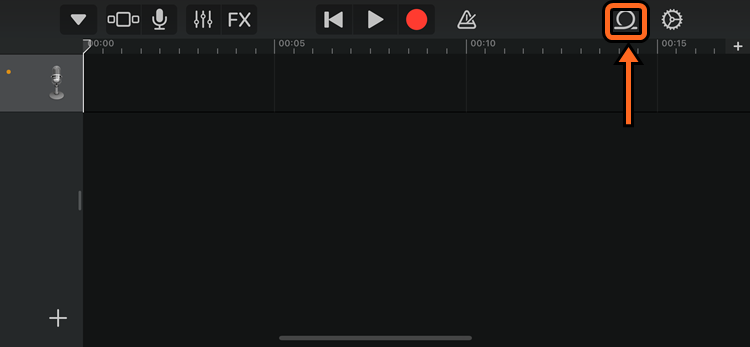
3. Then go to the Loops button (this is for adding a soundtrack).
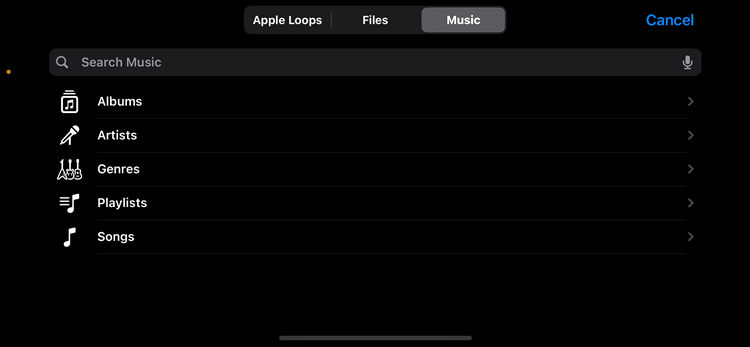
4. Go to Music then Songs.
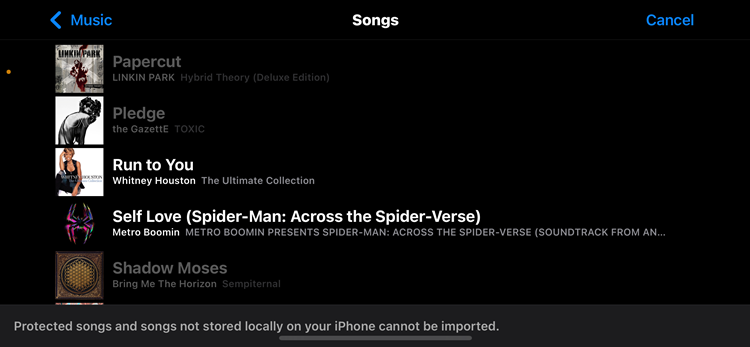
5. Select the soundtrack that you want. Then press-hold the track and drag it to the left.
Do note that you may encounter some inconveniences when choosing your favourite song. If the song track is dimmed (as seen in the screenshot above), that means it is protected and cannot be used as a ringtone at all. Downloading the song to your Music app does not count if you have been streaming all this time, so you must purchase the song. If you are part of the family sharing plan, anyone who purchases a song can be used.
Unlike iTunes, there are no "Start" or "Stop" options for you to choose a specific part. So you will need to manually trim the parts you want by dragging the left and right frame of the song. And if you want a more precise part of the song, you need to touch and hold either edge. Remember to drag the song back to the left because we don't want any blank space before the ringtone.
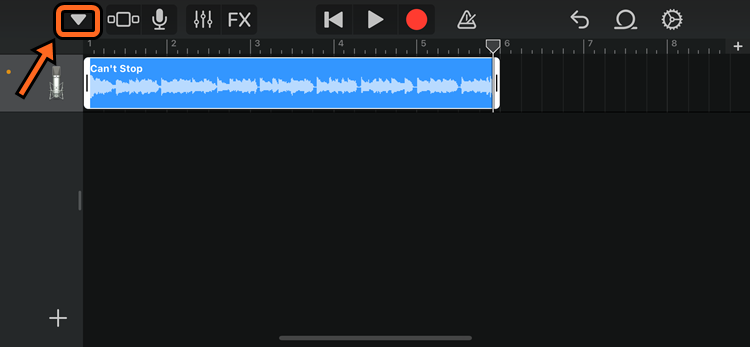
6. Once you are done, go to the Navigation button to save your ringtone.

7. This is where all the saved files are. We recommend renaming your file so you won't get confused if you plan to create more.
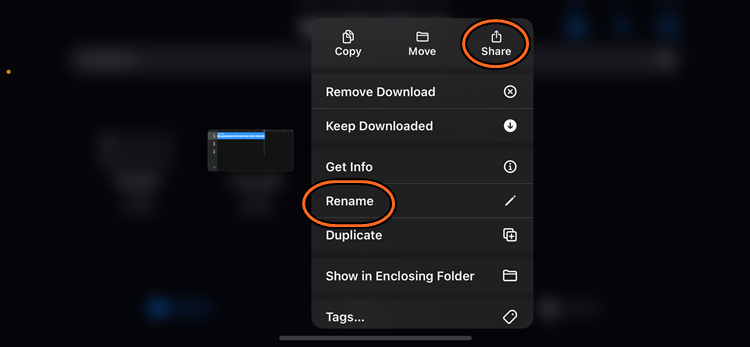
8. Press-hold the file to see the options. After renaming (or not), tap on Share.
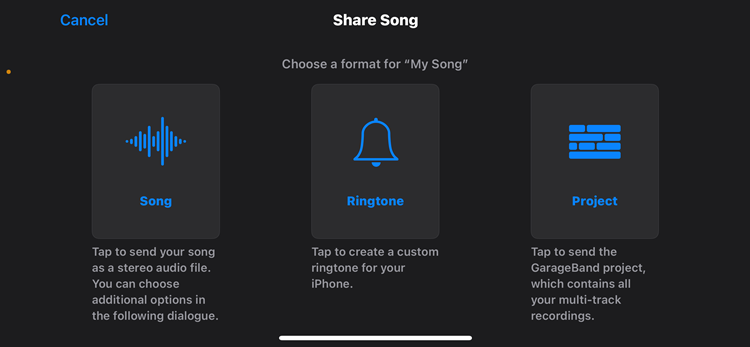
9. Choose Ringtone and it will automatically be saved in the Settings.
When you save your new ringtone, this part will also ask you to set a name for the ringtone (for the Settings) as well as choose it as a Text Tone or Assign To Contact. After that, you are all set and done!
End of the tutorial, but which one is better?
And that's it! You have successfully created your own ringtone from either iTunes or Garageband app. Both methods have their own pros and cons (see the table below), but those are the best methods that we have right now.
| Platform | Pros | Cons |
|---|---|---|
| iTunes |
|
|
| GarageBand |
|
|
By the way, you can also create your own song by exploring the built-in Touch Instruments or record yourself singing or playing an instrument in the GarageBand app. If you want to change your ringtone on your iPhone again, simply visit the Settings app > Sounds & Haptics > Ringtone.
If you know any other methods to create your own ringtone for your iPhone, do let us know in the comments. Stay tuned for more trending tech articles only at TechNave.com.


COMMENTS