"Do I look fat in this photo?" That's probably one of the questions that your friends, family, or even yourself asks after taking a photo shot. Well, that's also probably why you're here looking for tips on how to take a good portrait shot and in this article, we will be using the latest Samsung Galaxy S10+.
Yeah, we could have used other smartphones but the Galaxy S10+ is the real deal! Plus, the technique can be applied to most smartphones anyway. So just sit back, enjoy the photo samples and write down our tips on How To Take Stunning Portrait Shots (with the Samsung Galaxy S10+ camera).
Use the Portrait Mode (and always have the grids enabled)
Starting with the most basic tool, the Portrait Mode (it has other names too, or Live Focus, in Samsung's case) is already at your disposal in the camera user interface. Most smartphones nowadays have that feature already thanks to the dual camera trend that started out since 2016, so use it! However, do note that you still need to know some camera composition (for example, the Rule of Thirds), or else the photo will be just like "meh". So, always have the photo grids turned on (which you can find in every camera setting) for guidance.
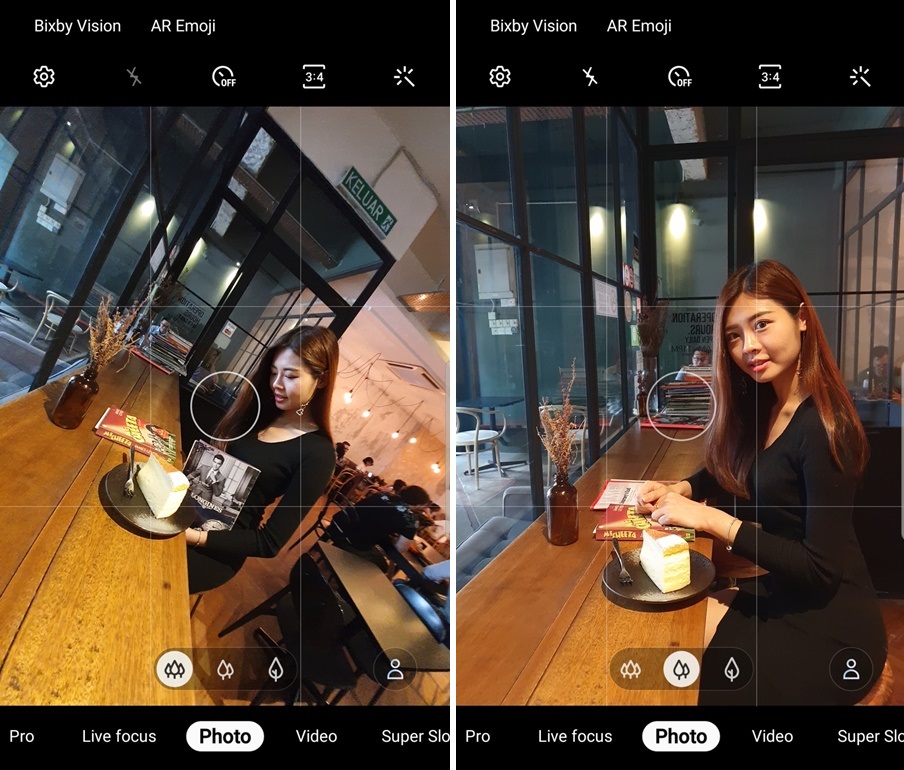
TIP#1 - To get a good feel of the Rule of Thirds, always place your subject near to the cross point (where the lines meet in the grid) before taking the shot
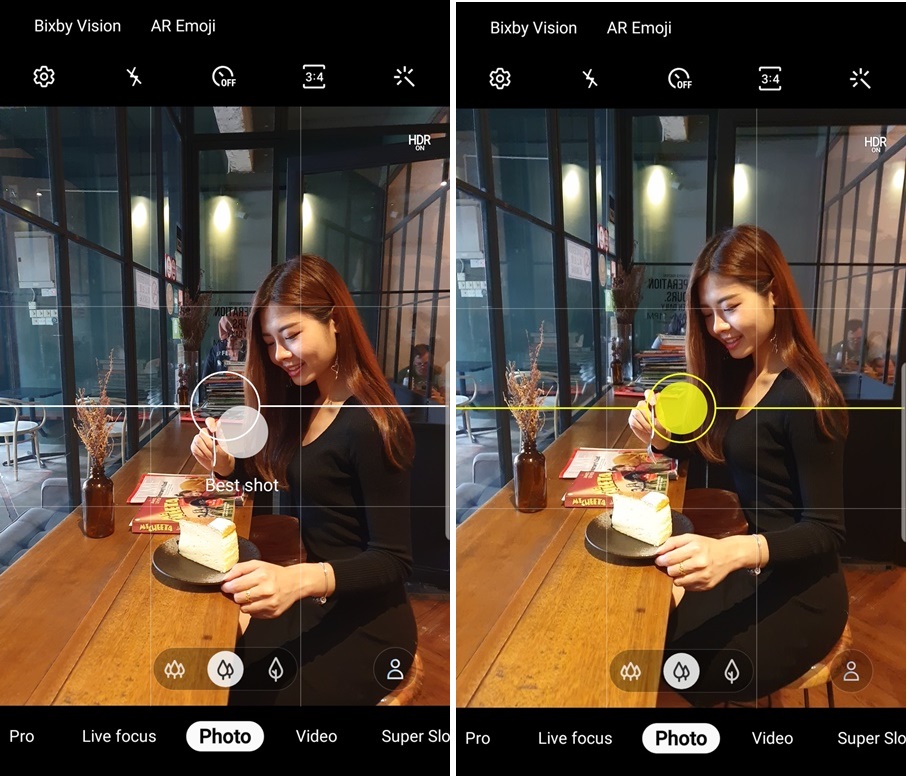
TIP#2 - Alternatively, you can also turn on Shot Suggestion, a new Samsung camera feature to assist you in getting the best placement for your shot
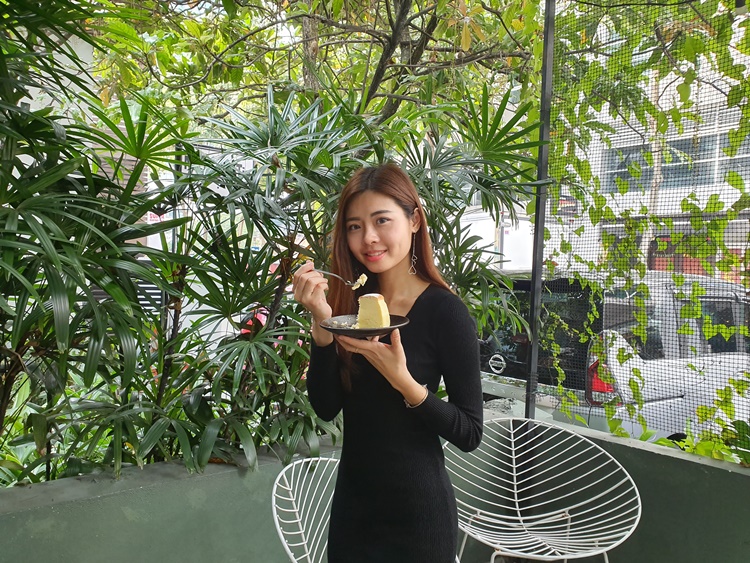
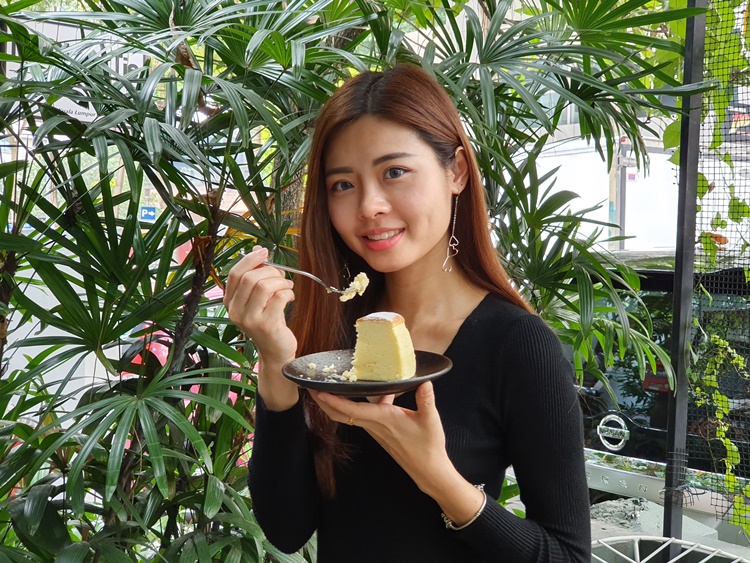
And now... our resulting Portrait Mode shots!
You can also use the normal camera mode, but it sure makes a lot of difference. Although all Portrait Modes are different on each smartphone, almost all serve the same purpose - to capture the subject as the highlight while blurring the background. Speaking of blurring the background...
Master the lighting
Lighting also plays an important role and to tackle that, some smartphones do have the power to control the aperture, which results in changing the overall lighting and background's depth of field (a.k.a. bokeh effect) of your subject. On the Galaxy S10+, the Dual Aperture feature is very useful as it can change the outcome and "feel" of a photo.
Basically, the bigger the aperture (a small number like F/1.5), the more blurry it will be, whereas the smaller the aperture (a bigger number like F/2.4), the less blurred it becomes. Dual Aperture is a nice feature, but it doesn't make that much of an impact during the day time and is best used in low-light environments.
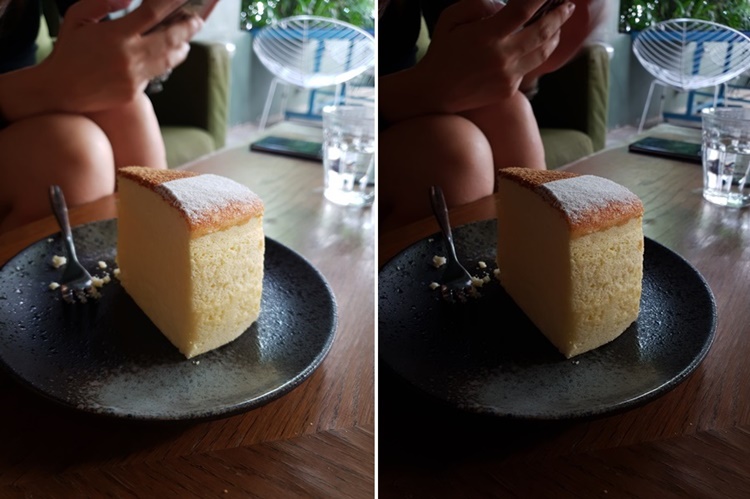
TIPS #4 - The difference between aperture F/1.5 (left) and F/2.4 (right)
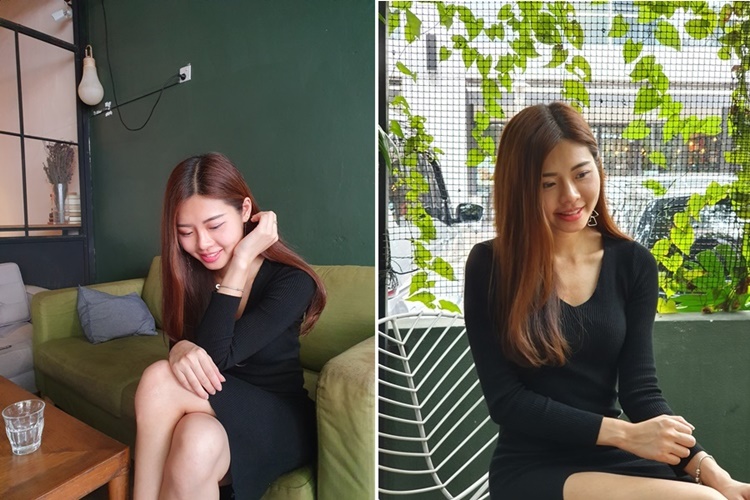
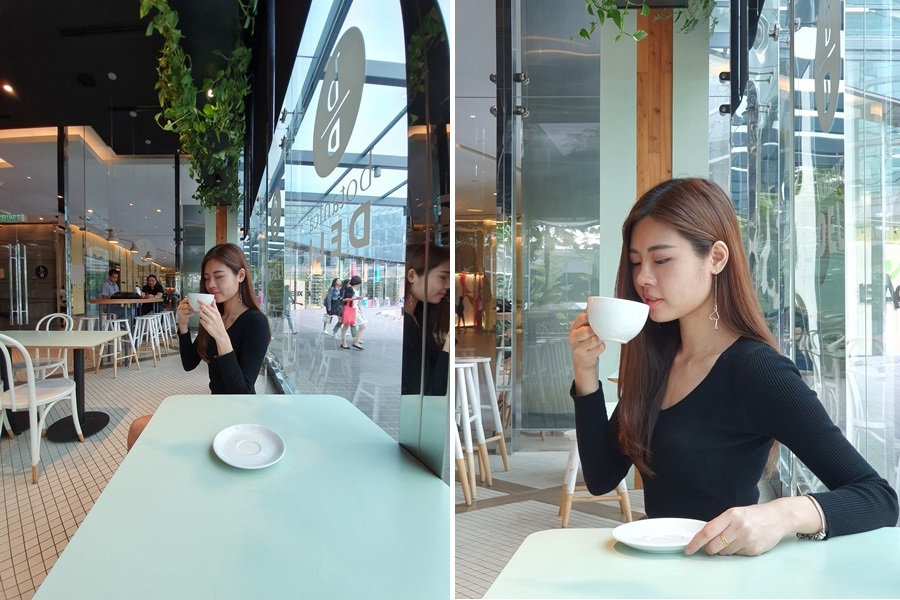
TIPS #5 - Light is an integral part of photography. On the left photo, it's always best to use the natural sunlight against the subject. While on the right photo, a background with strong backlight is nearly never a good idea, unless you can find something that blocks some backlight around the subject like leaves, then it's passable
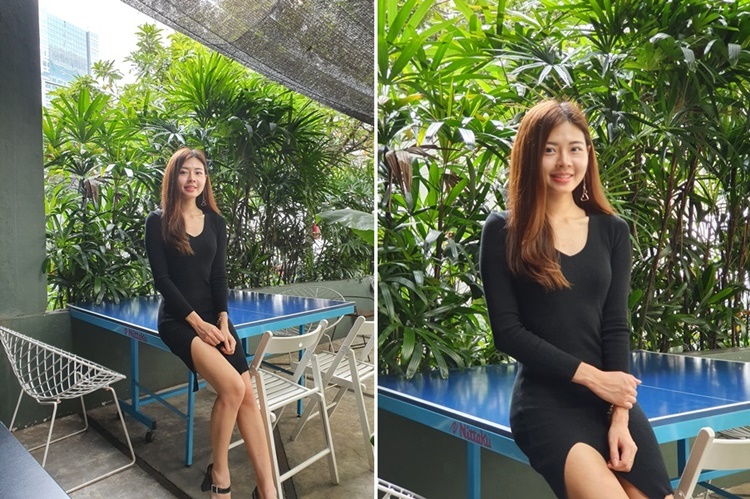
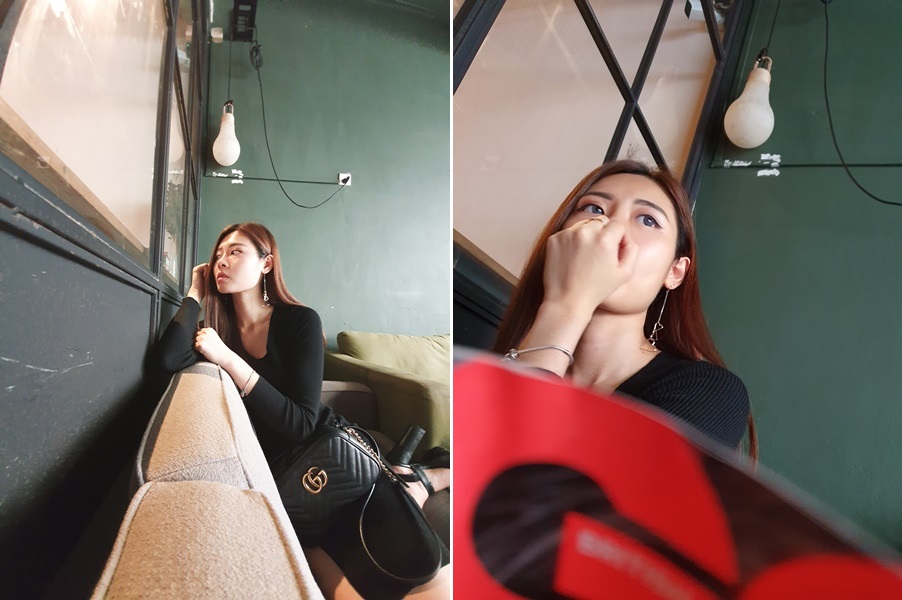
TIPS #6 - A small portion of backlight is still alright as long as it does not interfere too much with the subject, but sometimes it can be used as a silhouette shot just like the one we did in Broga Hill. On the other hand, you can also go nearer to the subject (right photo) and still take a nice shot
TIPS #7 - Here's a nice shot of our subject, but there's too much space on both sides. How do we make it better?
TIPS #8 - The answer is just go nearer. Alternatively, you can also crop the image vertically
Do note that controlling the aperture will also influence the amount of light entering the camera lens, which could make or break your portrait shot. And if your smartphone has a fixed aperture, you can learn how the bokeh effect and light works best, so do some experiments to know your smartphone's camera.
Take advantage of the ultra wide-angle lens
Ok, so let's say you don't want to use the Portrait Mode, there must be another way of taking a portrait shot, right? Of course, there is. But not all smartphones will have this, as having an ultra or a normal wide-angle lens has just started to roll out and surprisingly, it can also be a useful tool for your next Insta-worthy photo.
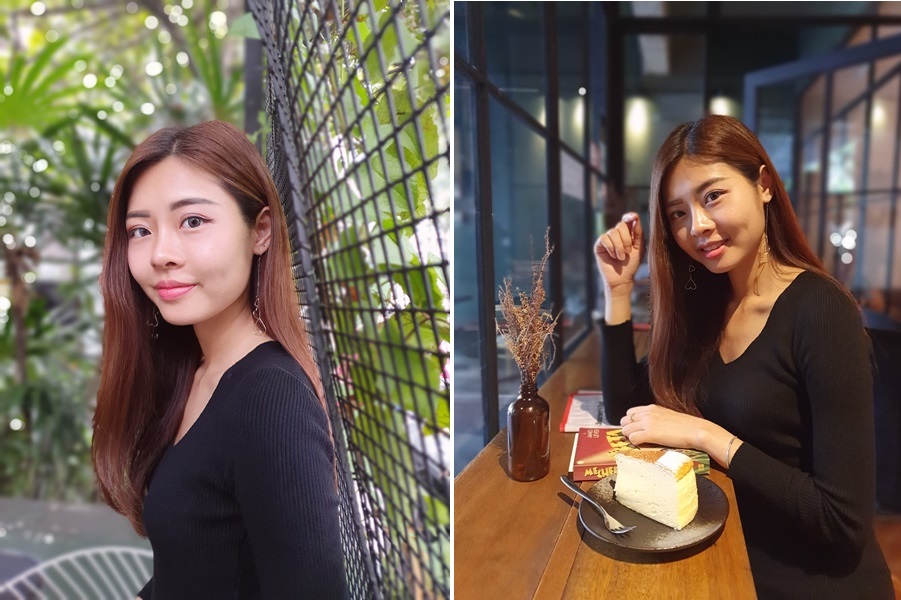
Taking a portrait shot with an ultra wide-angle lens requires a different technique, though. Since the ultra wide-angle would likely capture the whole subject within the frame, the best angle is either from the top or bottom and of course, a fabulous pose to make it work. For example...
TIPS #9 - You can see the difference of using an ultra wide-angle lens (left), or if you want to be closer, just go nearer or use the telephoto lens (right)
TIPS #10 - The ultra wide-angle lens can be utilized in any situation like the photos above, near (right) and far (left)

TIPS #11 - You can also take a normal ultra wide-angle shot. Once again, you can see the subject placed nicely near the Rule of Thirds spot
Put Some Filter On It
Lastly, if you feel your portrait shot needs more "OOMPH". This is where filters come in. Instagram has plenty of those, even from your smartphone's default filters, but the Galaxy S10+ has four decent ones that are available in the Live Focus editing feature. These are blur, spin bokeh, zoom bokeh and colour point.
Personally, the colour point is one of the best ones I've seen in a smartphone so far, as other smartphones don't really have an accurate colour filter when edited.
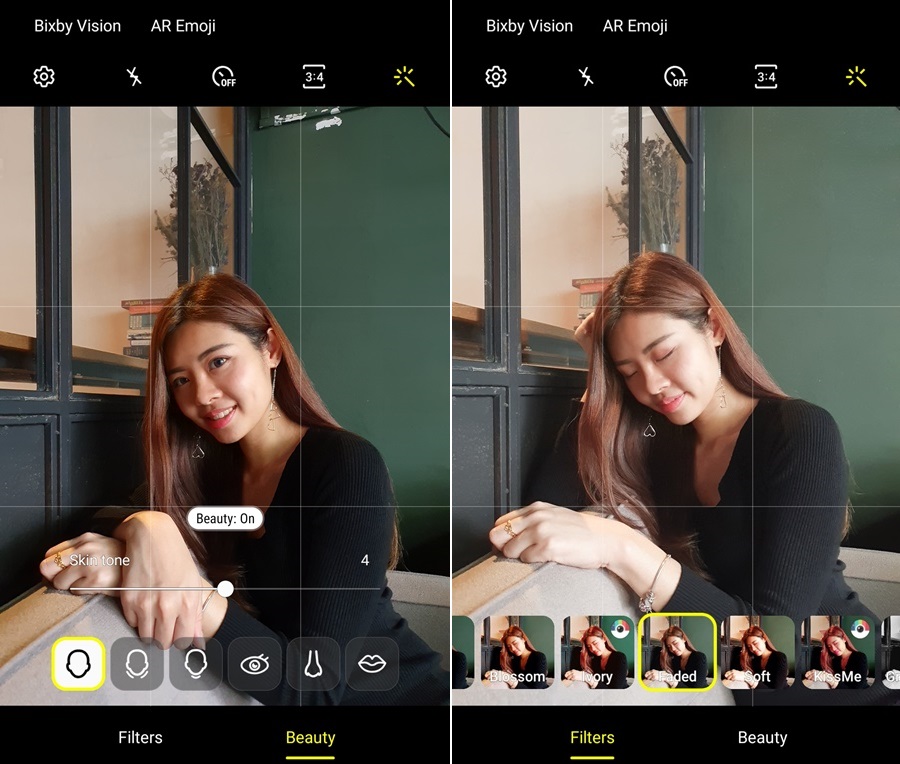
TIPS #12 - You can also choose Beauty Mode which almost every phone has. Don't feel bad, it's art

TIPS #13 - Sometimes, you don't always have to use the Rule of Thirds. If you look at the left photo, the subject is placed perfectly in the middle, also the right side picture is using a spin bokeh effect
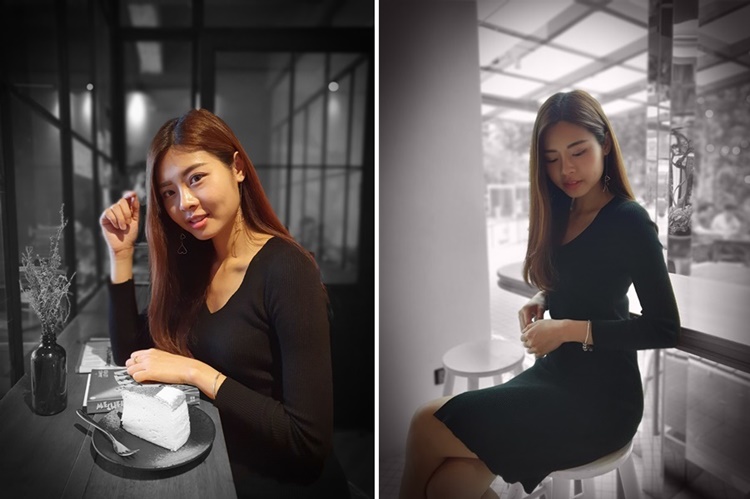
TIPS #14 - This is the colour point filter that I was talking about, bringing out a noir feel. Perfection
So these are our tips on raising your portrait shot game! Remember, these tips can also be applied on other smartphones (if they have the features) but some of the best results we've seen so far are from the Galaxy S10+ (as you can see above). Stay tuned for more reviews of the flagship as we explore more, only at TechNave.com.


COMMENTS